
May 12, 2026
Your First Drive Starts Here: A Step-by-Step Assembly and Driving Guide
Welcome to the Strutt family! To ensure your first experience is smooth, safe, and enjoyable, we’ve put together a step-by-step guide from unboxing to your first drive.
Take it one step at a time, and you'll be rolling in no time.
Before your box arrives
We highly recommend downloading the Strutt app and creating your account before your vehicle arrives. That way, you are ready to get started the moment your ev¹ box hits your doorstep.
An Important Note: Your First Charge & Update
To protect your battery and ensure a successful initial setup, it is crucial to follow these steps as you set up:
-
Charge the battery first
Remove the battery from the vehicle and charge it to full before starting your ev¹. Do not use the armrest charging port for this initial charge. The armrest charging port can be used only after completing the first upgrade. -
Update the vehicle
When running your initial firmware update to version 1.1.9.11, make sure the vehicle is completely unplugged from the charger. Never charge and update the vehicle at the same time. -
Charge to full
Once the firmware update completes successfully, fully charge the battery (to 100%) before your first drive.
Step 1: See What's in the Box
Before you start unpacking, take a moment to familiarize yourself with your ev¹ package.
Watch our video on What's in the Box
Your ev¹ arrives in 3 separate boxes. Please check that all items in the boxes are accounted for before you start unpacking.
Step 2: Unbox and Assemble Your ev¹
Now that you know what is included, it is time to put your ev¹ together.
Watch our video on Unboxing Guide
Watch our video on How to Assemble
Tip: You'll find a dedicated tool kit inside Box #3. Keep it handy as you'll need it during assembly. Once assembly is completed, store the H3 tool together with the rest of the Allen keys under the seat cushion. The tools can be kept in one spot, so it's easy to find them when you need them.
Need to pack it up for a road trip or store it? We've got you covered.
Watch our video on How to Disassemble
Step 3: Charge Your ev¹ battery
Upon receiving your ev¹, please remove the battery from the vehicle first and charge it to full before inserting it back and to start your ev¹. Do not use the armrest charging port prior to completing your first upgrade.
Your ev¹ has traveled from the factory to your doorstep, and the battery may gradually lose charge during shipping. A full first charge helps recalibrate the battery, so it reads accurately from Day One, giving you the most reliable range going forward.
Your First Update: Please do not plug in your ev¹ while the initial firmware update is running. Once the update finishes, give the battery one final full charge before setting off on your first drive.
Watch our video on Battery Charging Options
Charging times to keep in mind:
- From 0 to 80%: Approximately 1 to 2 hours
- From 80% to 100% (full charge): Approximately 3 to 4 hours
While your battery is charging, it's a great time to set up your app.
Step 4: Set Up Your Armrest
The armrest is key to your comfort and houses the controls. Watch this video to have it installed correctly.
Watch our video on Armrest Installation
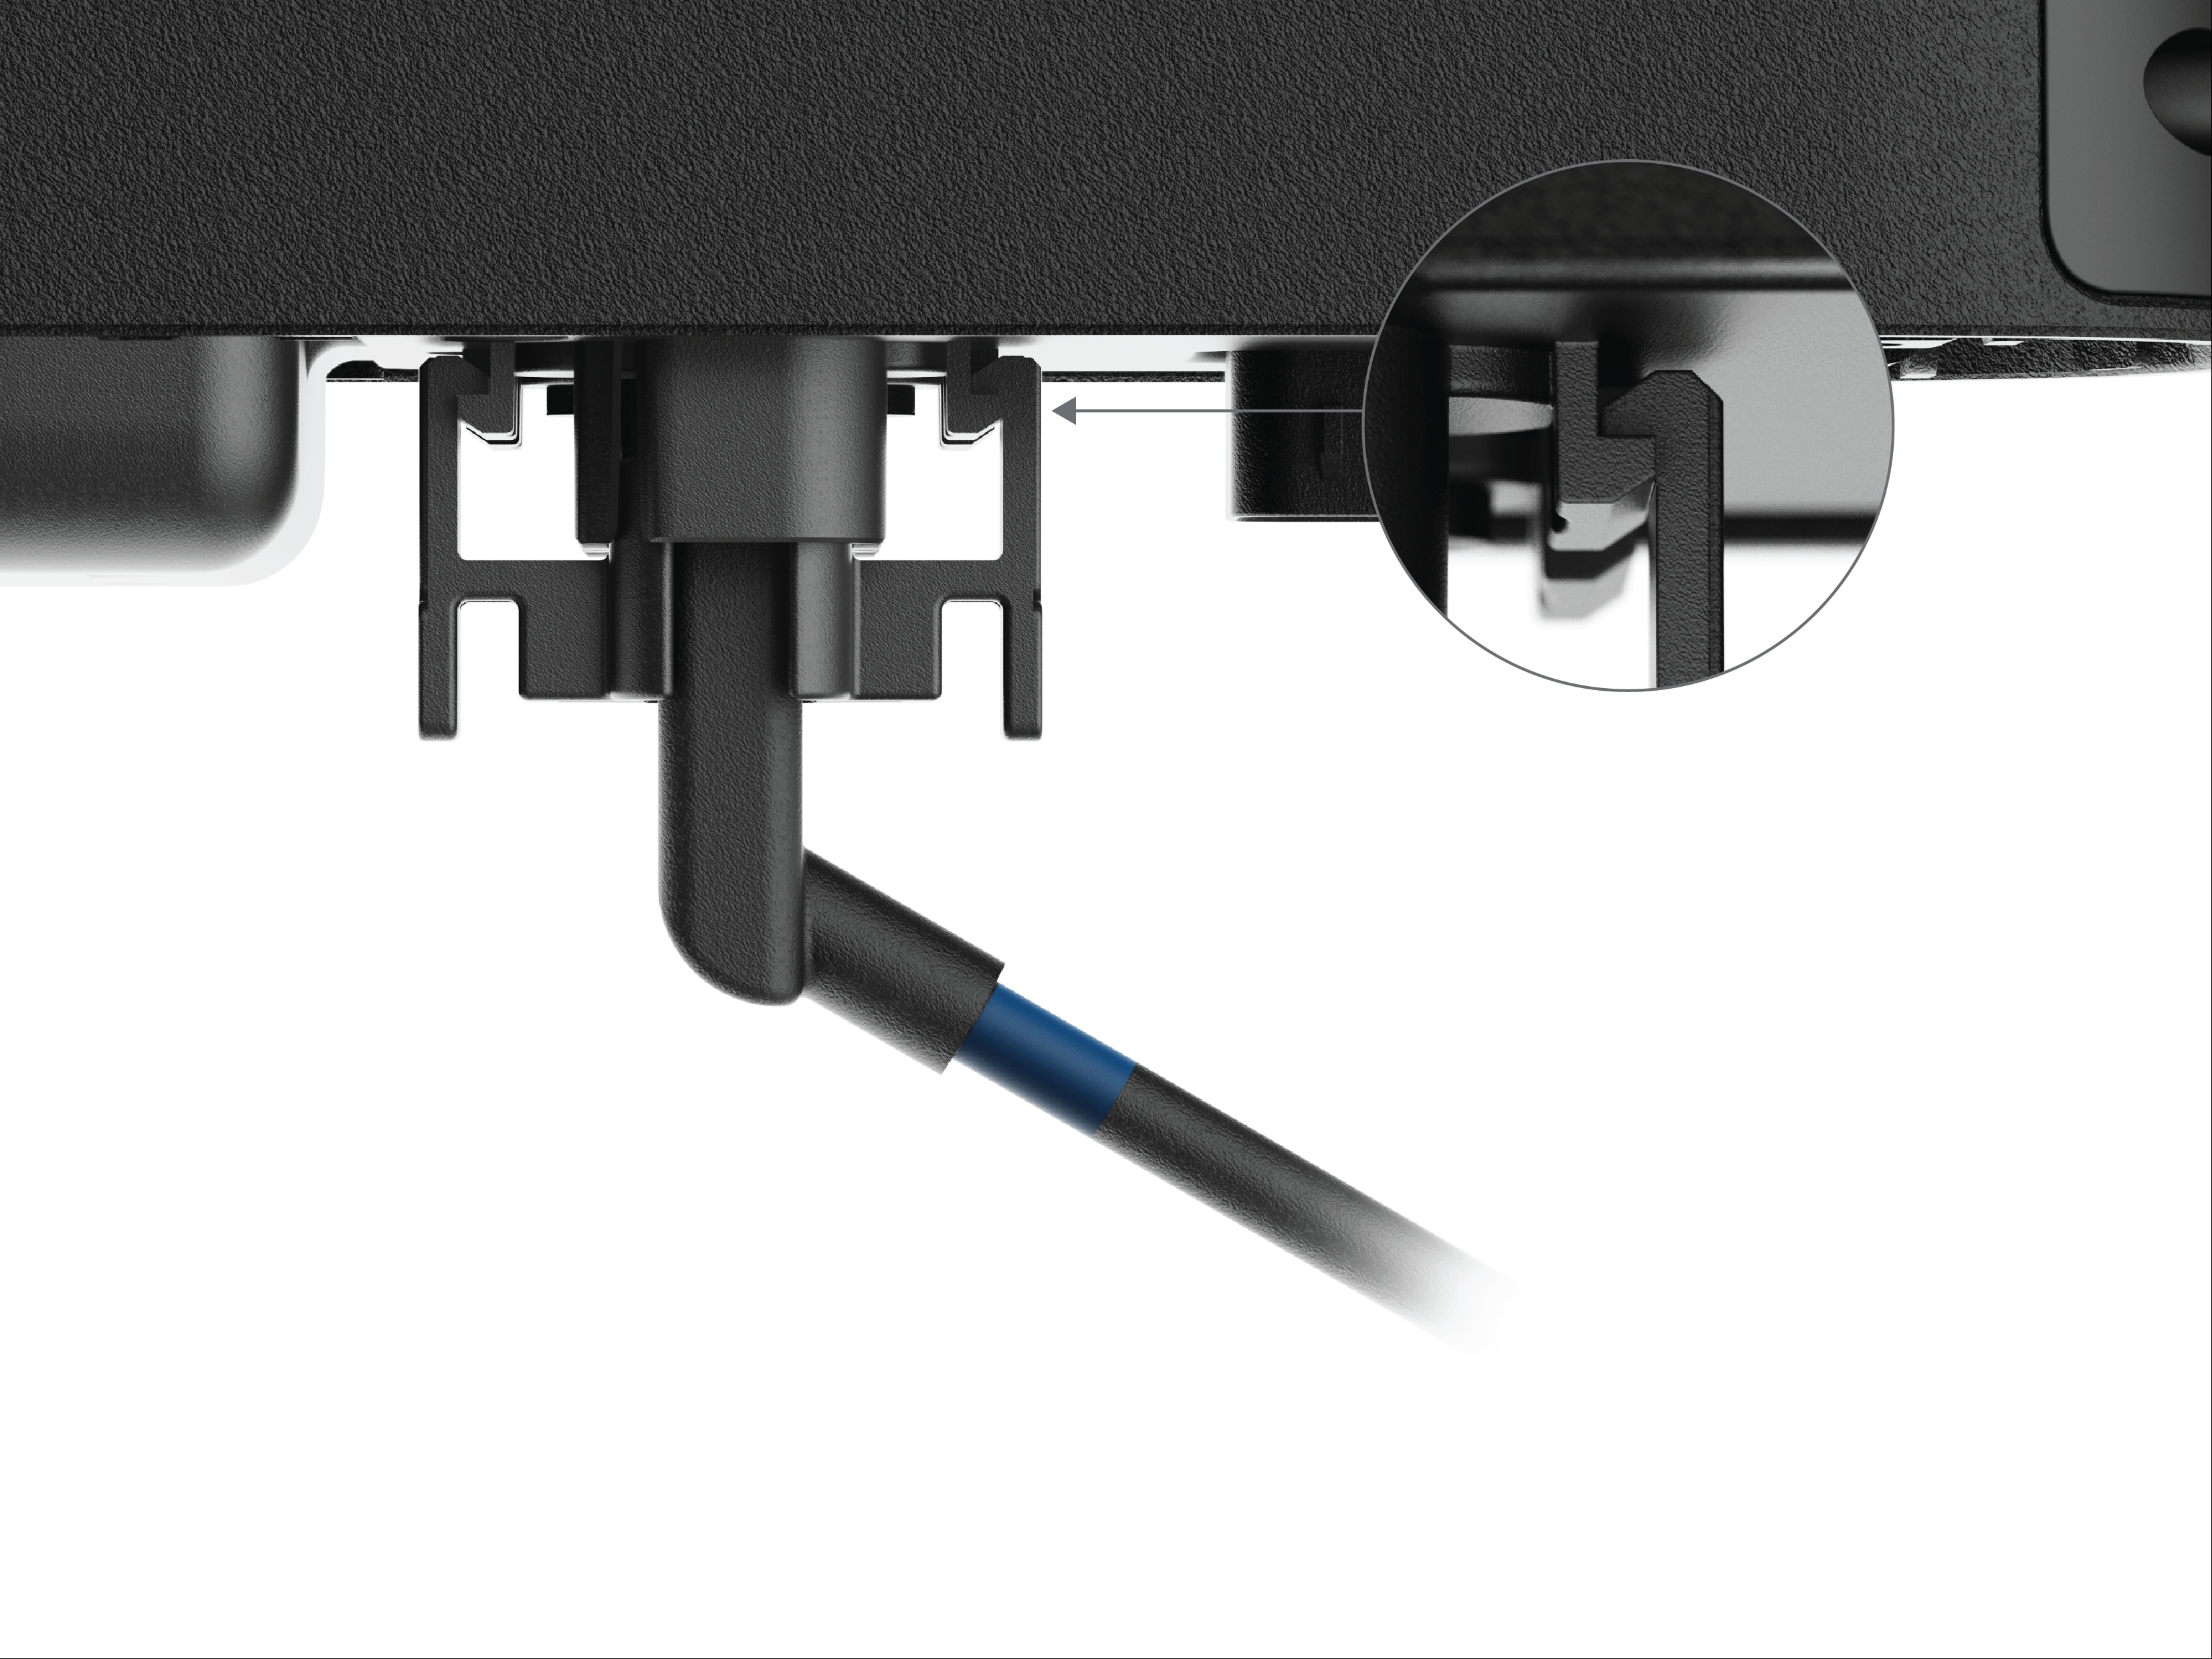
Setting up your controls on the left?
Securely connect the color-coded wires to both armrests, including the side without the screen and controls. The wires are color-coded and should click firmly into place.
Check out the image below to see exactly how a secure connection should look.
Step 5: Set Up the Strutt App
The Strutt app is your control center. To start driving, create an account and activate your ev¹ through the app.
Watch our video on Strutt App Setup & Control
Important note: Once you're in, take a moment to check for the latest firmware update and install the latest version before driving the vehicle. This is necessary to ensure a smoother driving experience.
Every update brings a richer driving experience, performance improvements, and bug fixes. Please check for updates regularly and update to the latest firmware when you receive the ev¹.
Every update brings a richer driving experience, performance improvements, and bug fixes. Please check for updates regularly and update to the latest firmware when you receive the ev¹.
Step 6: Get Ready to Drive
Almost there! Before your first drive, watch this video to understand how to safely enter the ev¹ and what to expect before you set off.
Watch our video on Entry and Ride Preparation
Safety note: In an emergency, press the power button to stop the vehicle immediately.
Step 7: Tailor Your Drive
Now that you're set up, it's time to make the ev¹ truly yours. This is where you adjust the settings to match your body, preferences, and riding style.
Watch our video on Custom Adjustments
Important Note: After adjusting your seat height or armrest width, it is essential to update the parameters under the evSense settings to ensure a safe driving experience.
If you have accessories to install, here's how to do it.
Watch our video on Accessories Installation
Step 8: Time to Drive
You're ready. Start with the basics and build your confidence before exploring the more advanced features.
Watch our video on Driving 101
Once you're comfortable, take your driving experience to the next level.
Watch our video on Advanced Driving
Before using Co-Pilot, Co-Pilot+, Waypoints, or Pathfinder, or any other assistive intelligent driving features, please read the evSense System's Safety Guide.
Understanding the system's boundaries is essential before using any of these features.
Ongoing Care & Driving Tips
To get the most out of your ev¹ day-to-day, keep these best practices in mind:
Sleep Mode
When you're not using the ev¹, always switch it to Sleep Mode. Leaving it on standby consumes power even when stationary, which can significantly reduce your driving range.
Range Mode: If you are planning a long day out or covering longer distances, switching to Range Mode extends your battery range. Note: evSense is disabled in this mode, so stay extra alert and careful while driving.
Sensor Maintenance: Sensors, including LiDAR, ToF, and camera lenses, can accumulate dirt over time. If you notice unusual navigation errors, clean them with pure water wipes only. Do not use alcohol, alcohol-based solutions, or any abrasive wiping tools.
You're All Set!
That's everything you need to get started. If you run into anything along the way, our customer support team (support@strutt.inc) and the Strutt community are always here to help.
